Introduction
Recently many people asked my help in the implementation of ESP8266 sketches to let two or more modules communicate over the MQTT protocol.
This article provides and describes a basic MQTT source code working skeleton to interconnect ESP8266 modules over MQTT protocol.
The goal of this code is to provide a start point to beginner developers to develop their application by extending it.
MQTT
The main site for MQTT (Message Queuing Telemetry Transport) is [http://mqtt.org/].
MQTT is define in this way: “MQTT is a machine-to-machine (M2M)/”Internet of Things” connectivity protocol. It was designed as an extremely lightweight publish/subscribe messaging transport.”
The basic and key actors in a Publish/Subscribe architecture are:
- A communication Broker : a central communication component which orchestrates all the communication processes and that manages the entire life-cycle of topics and messages
- An agent which take the role of Publisher: sending messages to a specific topic living within a given MQTT
- An agent which take the role of Subscriber: receiving messages from a specific topic on a broker
- A Topic: a dedicated communication channels between devices
In this architecture a Publisher communicates with one or more Subscriber without knowing its/their identity (any type of addressing)
In other words when a Publisher wants to communicate, it just sends a message to a broker for a specific topic.
After the message has been delivered to the broker, it’s broker responsibility to propagate the message to all the Subscriber which are “listening” of a given topic (Publisher and Subscriber must publish and listen on the same topic).
Such architecture is present in many different IT domains and it is not limited to MQTT only.
As an example (over simplified), the Pub/Sub architecture is used by most of the GUI systems (Windows, Linux, …). For instance when I click on a button in a window, the windows manager send a message (Publisher). The handler of the button is listening (Subscriber) and when receiving a message from the manager it execute a specific piece of code (i.e. close the window)
ESP and MQTT
The MQTT protocol and its Pub/Sub architecture perfectly fits in the communication between ESP8266 devices and between ESP8266 and the external world (cloud). This provides a very easy, lightweight and fast communication mechanism to be used in ESP8266 projects.
A huge advantage, from a networking and security point of view, is that a given ESP can communicates with external devices with no necessity to open a TCP port in the router/firewall (if you implement a more traditional web model yo must open a port in your firewall to accept incoming web requests).
The MQTT protocol is supported by virtually any platform out there and for sure by Android, iOS, Javascript. This allow for an easy communication between a mobile/web application and an ESP module.
CLOUDMQTT
The MQTT broker I typically use for my projects and in this sketch is provided by https://www.cloudmqtt.com/
The cloud service is available in different pricing tiers, included my preferred one: the free of charge :)
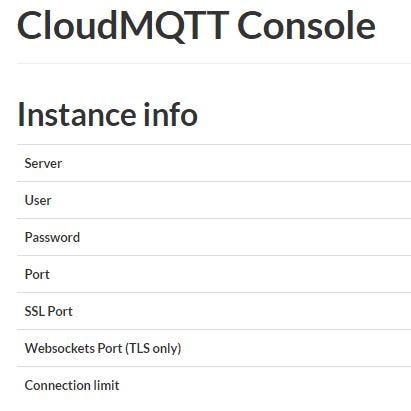
Once you have sign-up to the service you can access the cloud console
Here you can find all the detailed information about your MQTT broker that you can use to configure the ESP sketch
MQTT Basic
The sample code allows one or more ESP to communicate over MQTT protocol and is available here github.
Below some important #define which should be configured before compiling and uploading the sketch to ESP8266
- WIFI_SSID: the SSID of your WiFi network
- WIFI_PASSWD: WiFi password
- MQTT_CLIENT_ID: just a unique (random) ID for your MQTT client
- MQTT_SERVER: the FQDN of the MQTT broker
- MQTT_UNAME: authentication user name at the broker
- MQTT_PASSWD: authentication password at the broker
- MQTT_BROKER_PORT: listening broker port
- MQTT_TOPIC: the MQTT topic on which exchange messages
- ESP_NAME: a name for your ESP module
- ESP_PUB_ROLE: ESP is behaving as a Publisher
- ESP_SUB_ROLE: ESP is behaving as a Subscriber
ESP Libraries
This code uses the following libraries
MQTT.h and PubSubClient.h — v 1.99.0 — https://github.com/Imroy/pubsubclient
MQTT Basic Testing
The demonstration code can be tested either with 2x ESP communication between each other or 1x ESP and 1x MQTT client (for instance I will show how to use a mosquitto client on Linux, but any other MQTT client will be ok)
ESP as Publisher
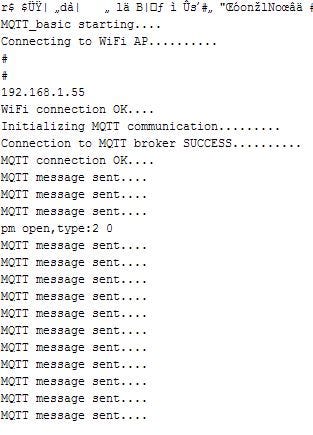
On the ESP sketch un-comment #define ESP_PUB_ROLE, then compile and upload the generated binary to ESP
Once the program starts you can see in the serial monitor something similar to the below
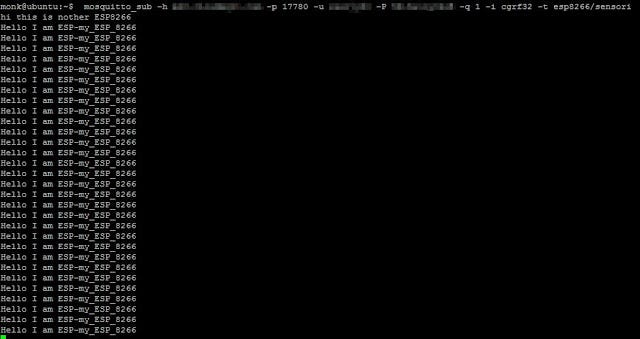
On a Linux shell you need to subscribe to this topic: esp8266/sensori
you can use the following command:
mosquitto_sub -h <host name> -p <port> -u <user name> -p <password> -i <client id univoco> t- esp8266/sensori
where the parameters between <> are the one visible in your CloudMQTT cloud console
As you can see from the screenshot, my client running on Linux somewhere in the Internet receives commands (the string “Hello I m ESP-my_ESP_8266”) from my ESP8266 running on my desk in my office. Pretty cool ah!!
ESP as Subscriber
On the ESP sketch un-comment #define ESP_SUB_ROLE, then compile and upload the generated binary to ESP
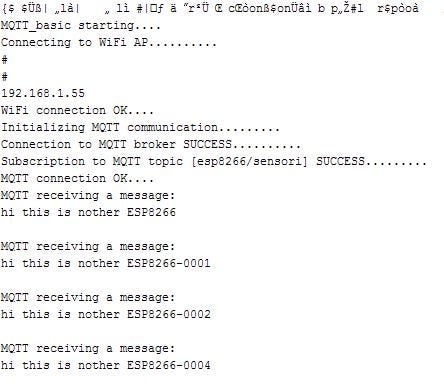
Once the program starts you can see in the serial monitor something similar to the below
On the Linux client now I send commands to my ESP through the following command:
mosquitto_pub -h <host name> -p <port> -u <user name> -p <password> -i <client id univoco> t- esp8266/sensori -m “hi this is another ESP8266”
where the parameters between <> are the one visible in your CloudMQTT cloud console

As you can see from the screenshot, my ESP8266 running on my desk receives commands from my Linux client.
Conclusion
The MQTT protocol and the Pub/Sub architecture are used in different environments and especially in the IoT market. They provide and lightweight and flexible communication mechanism that we can leverage to give our Arduino/ESP projects connectivity to the cloud or local network.
Let me know if you find this short introduction to MQTT on ESP useful and if use it in your projects send me a picture :)


Nessun commento:
Posta un commento