Visualizzazione post con etichetta egg painter. Mostra tutti i post

lunedì 30 ottobre 2017

The EggPainter


In this post I describe how I have realized the EggPainter and I show all the steps in a video
Then I show how to test the EggPainter and how to print on some eggs and some table tennis ball


Building Steps

In the below video all the necessary steps to build the EggPainter from scratch. In the remaining part of the post some additional details and useful information


Egg Painter

The EggPainter is a full project available on githiub. Its creator has shared all the necessary elements to build the EggPainter project


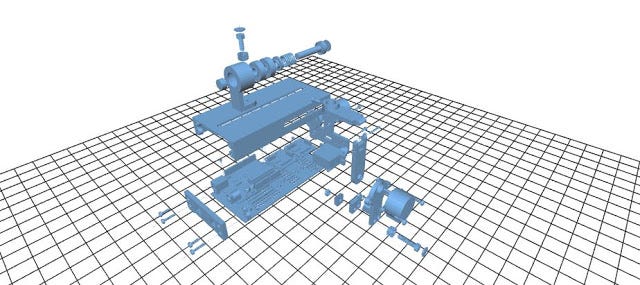
In order to realize the EggPainter project the following components are mandatory:
  • Arduino Uno
  • Stepper motors
  • Case
  • Supporting components


A key characteristic of this project is that all the STL file for 3d printing have been provided by the author. In other words a user can print with a normal 3d printer all the necessary elements to build the project. Obviously the Arudino and other electronic or mechanical components should be procured elsewhere.


Kit

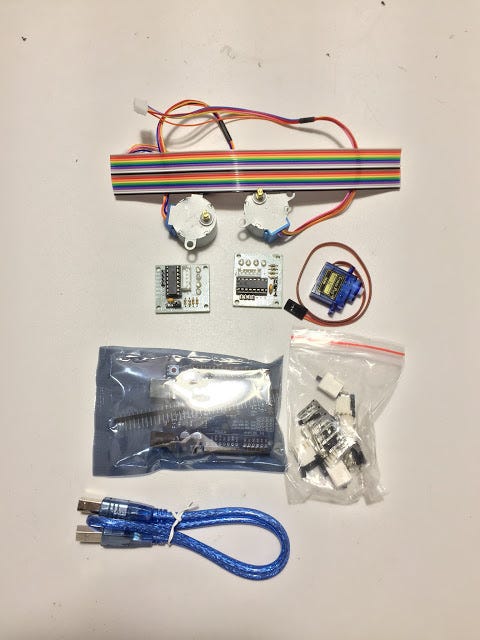
The Kit I have used (I didn’t print it myself) is coming from Russia and when I have open it looked like that:


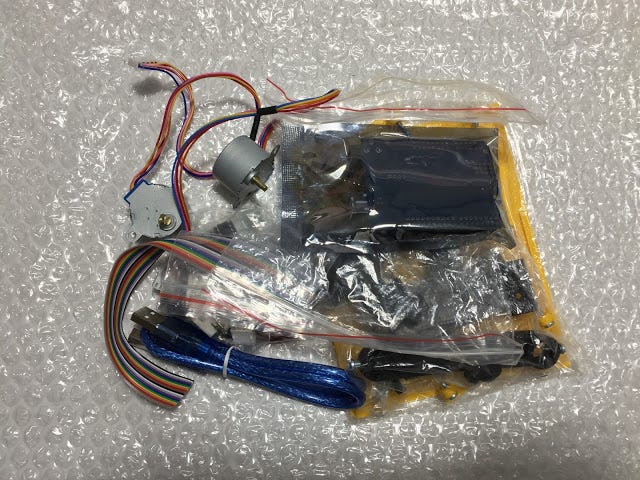
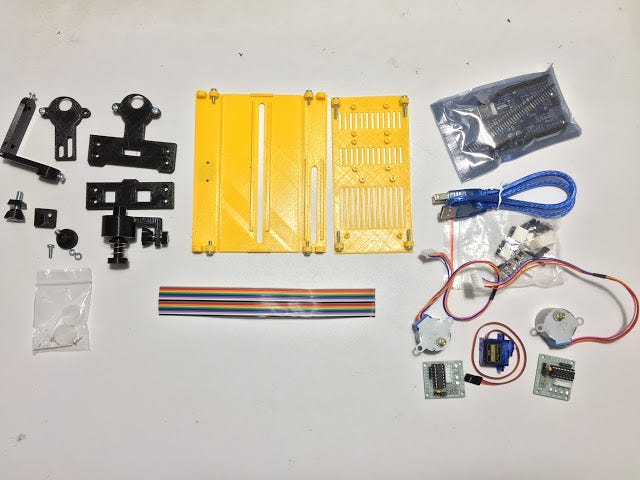
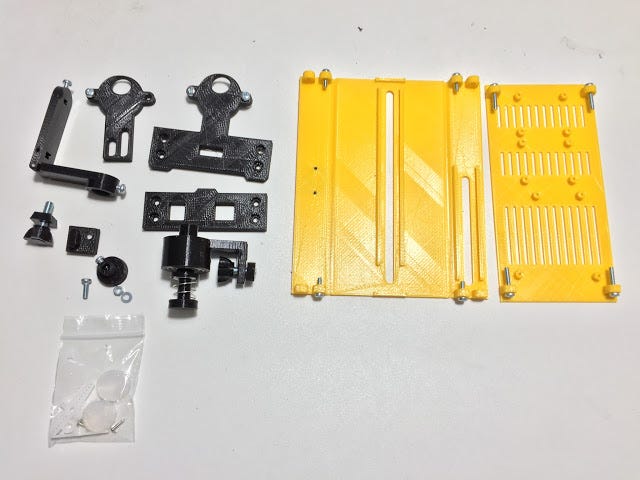
As it is possible to see all the necessary components to build the EggPainter are available in this kit


Disclaimer:

During the building of the EggPainter I have faced a major problem with this kit. Once I have closed the case with the bolt and nuts the remaining space for wiring it was absolutely not enough. In other words I was not able to properly close the case with the original kit.


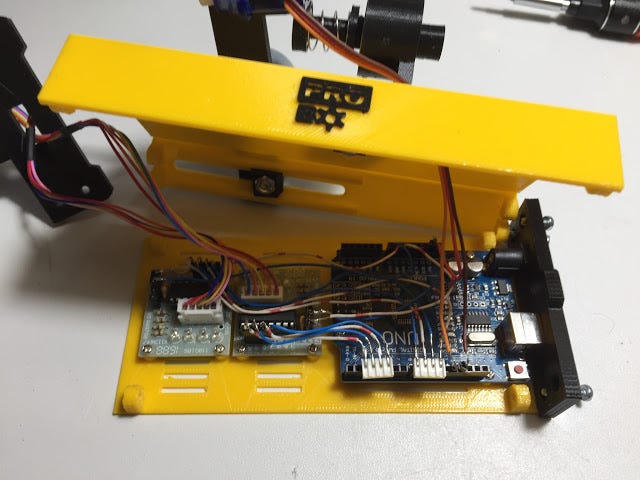
For this reason I have thrown away all the provide cabling and rebuild it from scratch. In any case for a maker with some basic capabilities it should not be a complex task.
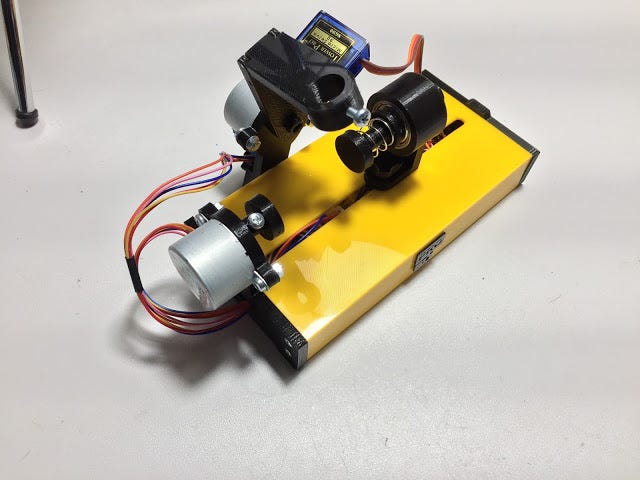
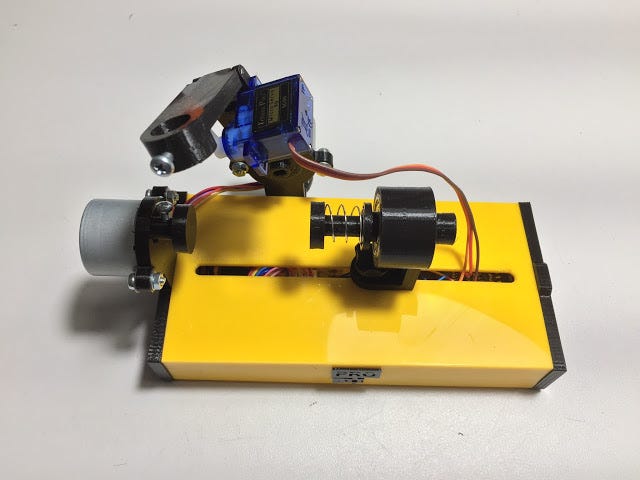
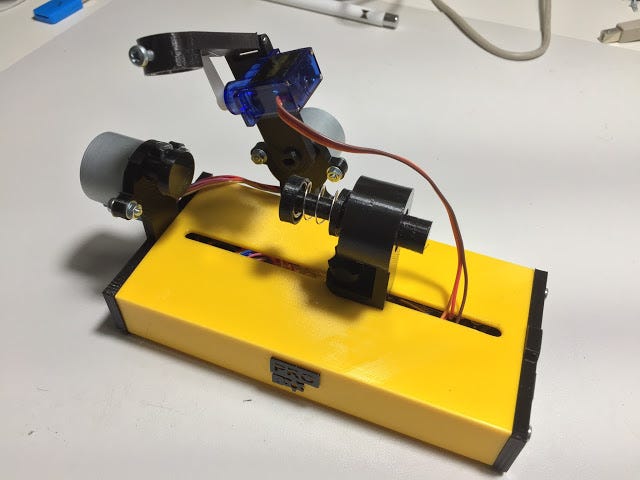
Below the EggPainter fully assembled after my modifications 


Firmware

The EggBot firmware is available here
Let’s now follow the below steps:
  1. Download the .zip file and unzip it in a preferred directory 
  2. Open the EggDuino.ino file in the Arduino IDE
  3. Compile the code and upload it to your Arduino Uno
  4. Quit from the Arduino IDE

At this stage the controlling software of the EggPainter is fully loaded on Arduino control board.


Printing Software

In order to print some vector art drawing it is necessary to instruct the Arduino board with the proper commands. This can be achieved through the use of a software called Inkscape.
Perform the following steps:
  1. Download Inkscape from here (Note:windows user should download 32 bit version)
  2. Install Inkscape and run it
  3. Download the EggBot extension from here 
  4. Unzip the file and copy its content in the directory shown here Edit > Preferences > System: User
  5. Restart Inkscape

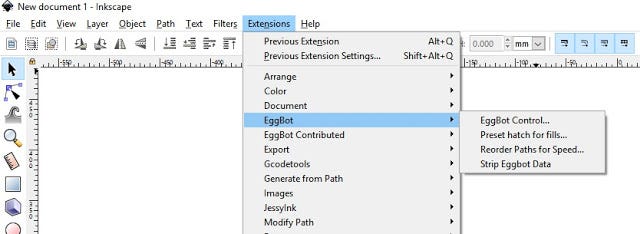
If the above steps have been successfully completed you should see EggBot in the Extension menu


Testing

Now we can move into testing phase as we have all the necessary elements to operate the EggPainter
In the below video I show how to test the EggPainter and check that all the motors are properly working.
The test is executing from the Manual tab in the EggBot menu


If everything works fine and the pen is goin up and down, the horizontal and pen motors spin in two directions then the EggPainter is ready for printing

Stampa

In order to print let’s import a SVG file in Inkscape (File menu -> Import) and let’s adapt the drawing area to:
  • 3200 x 800 px for eggs
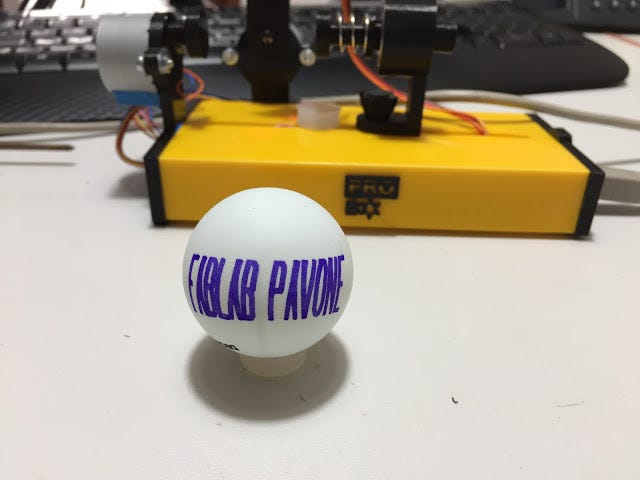
  • 4150 x 600 for table tennis balls

I really suggest you to experiment with those values and to find the right one for your print.
Below some pictures and video of printing done by me


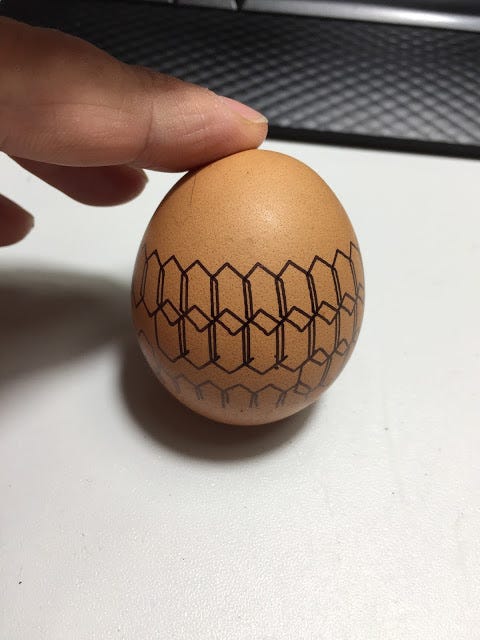
Happy Egg Printing everyone!!! :)


domenica 29 ottobre 2017

Kit EggPainter


Alcuni giorni fa' il FabLab Pavone di Torino mi ha gentilmente fornito un Egg Painter che e' un clone dell'original EggBot.

In questo post descrivo come ho realizzato l'Egg Painter e faccio vedere in un video tutti i passaggi.

Alla fine effettuo anche il test e poi stampo su delle uova e su delle palline da ping pong.


Montaggio

Ecco qui il video completo del montaggio. Nel resto dell'articolo i dettagli e altre informazioni utili


Egg Painter

Questo Egg Painter e' un progetto completo disponibile su githiub. Il suo autore ha condiviso tutti gli elementi necessari per realizzare l'Egg Painter.


Per realizzare l'EggPainter sono necessari i seguenti elementi principali:

  • Arduino Uno
  • Motori passo-passo
  • Involucro
  • Supporti

La particolarita' di questo progetto e' che il suo creatore fornisce i file STL per l'involucro e per i supporti in modo da poterli stampare con una normale stampante 3D


Kit

Il kit da me utilizzato e' stato acquistato dalla Russia e alla sua apertura si presenta cosi':


Come si puo' vedere include tutti i componenti necessari per assemblare l'EggPainter


Nota Importante:

Ho personalmente riscontrato un gravissimo problema con questo kit. Una volta chiuso l'involucro con le apposite viti lo spazio per i fili del cablaggio e' assolutamente insufficiente.


Per questo motivo ho dovuto rifare tutto il cablaggio da zero e NON ho potuto usare i fili forniti nel kit in quanto inadeguati.

Tuttavia questo per uno smanettone con un po' di manualita' non e' un problema.


Ecco qui l'EggPainter completamente assemblato e pronto per il primo utilizzo


Firmware

Il software da caricare e' disponibile qui

Ora seguite i seguenti passi:


  1. Scaricare il file .zip e scompattatelo in una directory a piacere.
  2. Aprire il file EggDuino.ino nell'IDE Arduino
  3. Compilare il codice e caricarlo su Arduino Uno
  4. Chiudere l'IDE Arduino

In questo modo abbiamo caricato il software di controllo dell'EggPainter sulla scheda Arduino Uno contenuta nel EggPainter stesso.


Software di Stampa

Per poter stampare e' necessario fornire alla scheda Arduino Uno i comandi corretti.
Per fare questo utilizziamo un software che si chiama Inkscape.

Eseguite le segueenti operazioni:
  1. Scaricate Inkscape da qui (Nota: per gli utenti Windows scaricate la versione a 32 bit)
  2. Installate Inkscape e lanciatelo
  3. Ora scaricate l'estensione EggBot da qui
  4. Scompattatela e copiate i file nella directory indicata qui Edit > Preferences > System: User
  5. Riavviate Inkscape

Se tutto e' stato eseguito correttamente dovreste vedere EggBot nel menus Extension


Test

Ora abbiamo tutti gli elementi per verificare se il nostro EggPainter funziona.
Nel video faccio vedere come testare il funzionamento dei vari motori dell'EggPainter. Per farlo basta andare nel menu Manual dell'estensione EggBot


Se tutto funziona correttamente, se la penna va su' e giu', se il motore orizzontale gira in entrambe le direzioni e se il motore della penna gira in entrambe le direzioni allora sei pronto per la stampa.


Stampa

La stampa avviene da Inkscape importando un file SVG e adattandolo all'area di stampa.

Per la stampa su uovo settare le dimensioni dell'area di stampa a: 3200 x 800 px

Mentre per la stampa su palline da ping pong impostare l'area di stampa a 4150 x 600 px

Tuttavia dovete sperimentare e trovare le impostazioni piu' corrette per il vostro EggPainter


Di seguito alcune foto delle fasi di stampa ed il video della stampe che ho effettuato


Buona Egg Stampa a tutti!!! :)